Configuring Apple Mail to Access Google Mail
Note: Gmail now supports IMAP. These instructions still work, but IMAP is probably a better option. Google’s instructions on getting IMAP to work with Apple Mail can be found here.
This is an explanation of how to setup Apple Mail to send and receive messages through a Google Mail account. Although Gmail is the best free webmail service available, it can still be handy to use a standalone e-mail client to access messages. For one thing, if your messages are stored on your computer you can read them even when you don’t have an internet connection. And you don’t have to look at the advertisements.
Note that if you set this up you’ll still be able to use the Gmail web interface to check and send e-mails.
Unlike Yahoo and MSN, access to the POP and SMTP servers for Gmail is free. However, because Gmail doesn’t store sent and incoming messages separately, there are a few tricks to getting this set up properly.
These instructions are for Apple Mail, but the differences involved in setting this up with a different e-mail client, or on another platform should be minimal.
Setting Up Gmail
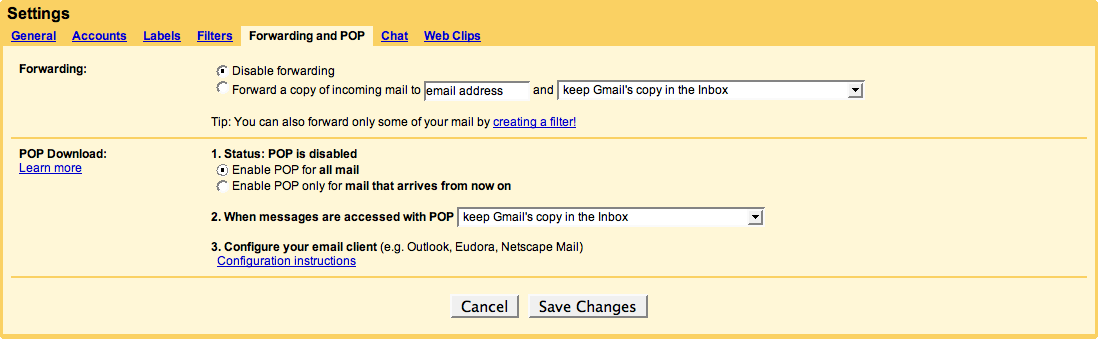
The first step is to turn on POP message downloading, so that you will be able to download messages to your Mac. Log in to your Gmail account, choose Settings and thenForwarding and POP. Make sure to check the radio button labeled Enable POP for all mail. Now click Save Changes. (Click the images to enlarge them.)
Now we need to set up a simple filter so that when you send a message from your Mac it doesn’t show up in the Gmail Inbox as an unread message. The first step is to click on the Filters tab in Settings.

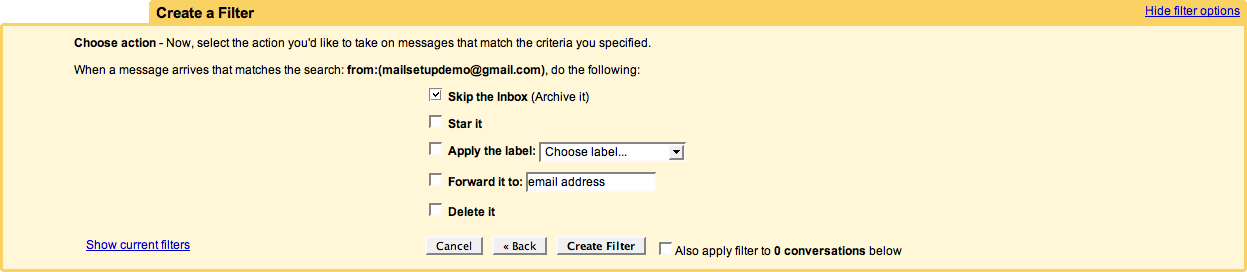
Now click Create a new filter. You want the filter to apply to all messages which come from your own Gmail account. Now, click Next step. (In this demo I’m using an account called mailsetupdemo@gmail.com — replace that with your own account.)

And now you want those messages to Skip the Inbox. Check the appropriate box and click Create Filter.
And that’s it. You’ll see a confirmation screen that looks like this. You can log out now — there’s nothing more to do in Gmail.

Setting up Apple Mail
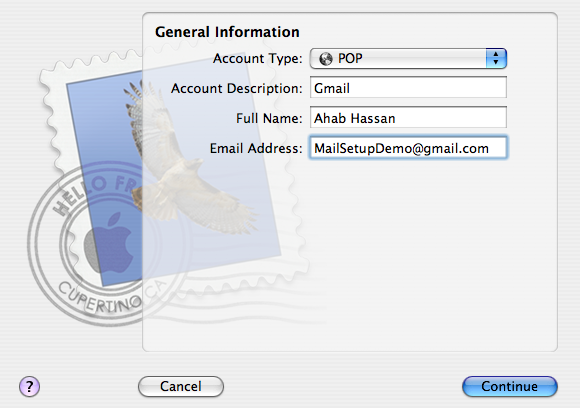
Next, start up Mail. If you haven’t used it before it will start the account setup process automatically. If you’re already using it with another account you’ll need to use the Preferences panel to add a new account. Once you have the account setup process started you will get the following screen. The critical thing is to choose POP as the account type. Enter the details for your Gmail account as appropriate.
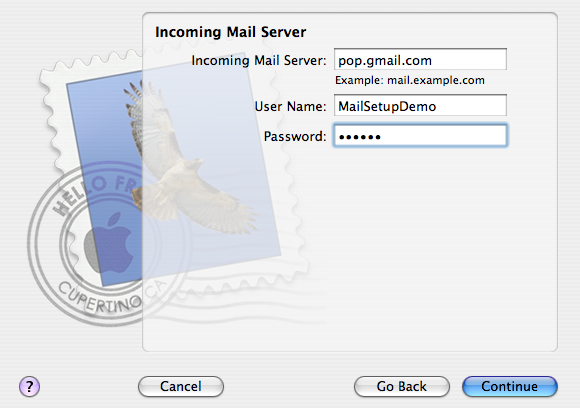
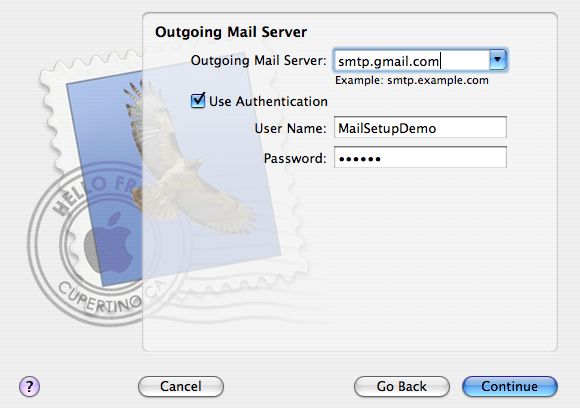
The next two screens ask for the details of the Gmail POP (incoming mail) and SMTP (outgoing mail) servers. Enter the information as shown below. Obviously, you need to enter your own username and password information.
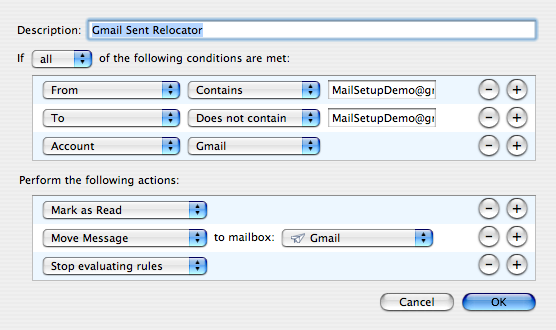
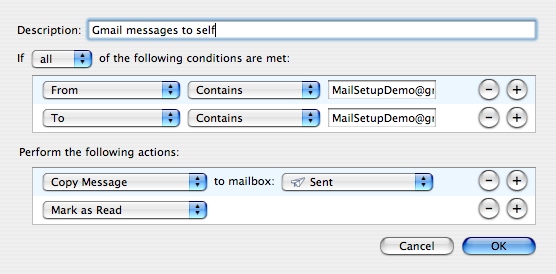
Once you’re done, your Gmail messages will begin downloading but to get everything working perfectly you’ll need to set up a couple of e-mail filtering rules. The first will make sure that any messages you send through the Gmail are transferred to your Sent mailbox. The second rule makes sure that if you send a message to yourself, a copy of it remains in your inbox. These rules are necessary because Gmail keeps both incoming and outgoing messages in a single folder.
Once you’ve set the two rules up as shown below — make sure that the rules apply only to messages that meet all the criteria — you will be asked if you want them to apply to messages in open mailboxes. Answer yes.
If you want to assure that the rules have been properly applied, select all the messages in your Inbox and choose Apply Rules from the Message menu.
And that’s it. You’re all set up and ready to go. And if you followed these instructions you’ll be able to use iChat rather than the Google Talk web interface.
One day soon I’ll write instructions on getting Google Calendar and iCal to play with each other.
thanks for this info, i’m useless at these things, very useful
Thank you. I am a new apple user. You have made my life easier.
Karen
I have followed all instructions, both yours and those on the gmail instruction page, but I still cannot send mail from my gmail account through the Apple mail app. Any clues?
Thanks for very easy to follow instructions.
hi there nice walkthrough
one thing I would add is it’s important to map the folders correctly otherwise things get nasty…
you can see this here
http://www.johnjones.me.uk/2007/12/09/setup-apple-mail-with-google-email-gmail/
regards
John
I am genuinely grateful to the holder of this site who has shared this
enormous article at here.